Posts

Showing posts from 2018

Revampimg my new Craft Nook: Phase 1

Image
 We moved back to my parents' place immediately after I gave birth to my darling baby girl. So far it is one of the best decisions we have made as a family! Moving houses means a new craft nook layout, I was pretty nervous about how I'll set up my craft nook, especially my video rig, because the last time we stayed here, we were staying in the smallest room. Back then it was enough for our small family. That was also back when my craft stash was really small. Noq, my parents let us stay in my childhood room that I used to share with my sister. I love it because it's the 3rd (or maybe 2nd) largest room in the house. The down side is, we can't remove the big, old TV cabinet and bookshelf, which means we dont really have that much space working for us because our bed is humongous. In the end, I settled for using the small bookshelf as our cabinet. Some parts of the TV cabinet are being used for our clothes, baby things and craft storage. I placed my table in one

Prima Watercolor Confections Decadent Pies for coloring

Image
I got my order of Prima Watercolor Decadent Pies last June 11, 2018 and I'm super excited to try it out. It's my second artist grade watercolor (Peerless was my first, check out my review here ) and I'm very excited to try it! Prima Watercolors are marketed to the crafting, card-making, scrap-booking, and coloring community. When you look for reviews in the watercolor art community, you wont see a lot of reviews for the brand. The watercolor is advertised as artist grade, high-quality, and highly pigmented. The company hasn't disclosed the type or source of pigments so there are no technical details about the light-fastness of the watercolors, which I believe is one of the factors why this brand hasn't infiltrated the watercolor art community yet. The watercolors are packaged to be an on-the-go watercolor palette. It comes in a nice black tin can with an aluminum finger hold at the bottom. When you open the tin, there's another aluminum cove

Reflection: Spending on my hobby and how my hobby is helping me grow as a Christian Woman

Image
It's funny how when I finally stop ignoring God's message because I know listening means giving up something I love, God gives me reasons why I shouldn't give up that something. This reminds me so much of Abraham and Isaac's story. The reading for May 29, 2018 was about selling possessions, giving to the poor and following Jesus. God has been telling me in various ways to stop spending on my hobby. A hobby that I have loved even as a kid, and has helped me though my post partum depression. Aside from spending, my hobby is taking time that I could be spending with him in prayer, in service, or even with my children. I didn't want to listen because I've been telling myself that self care is important, and that this hobby keeps the anger and the ugly thoughts at bay. I finally listened and I started writing my reflection down, talking to God, being intentional in my faith, when suddenly I get the messagr that my hobby is indeed good and that I should keep

DIY Small Pocket Envelope out of scrap

Image
I have several of these B7 Card Case inserts for when I bought a lot of the plastic card cases to organize the stickers I sell. I got that tip from my friend Chie of Craft with Undomestic Diva . She sells planner stickers and other pretty planner yummies. Since I love upcycling and recycling stuff, I couldn't throw away the inserts, so I decided to give these inserts one more shot at life! I turned them into small pocket envelopes. I'll use these to house the sticker flakes and other small things that I'll give to my friends. To make the envelope, I folded an insert in half then used washi to seal the sides. I used Spiced Marmalade Distress Stain to add color on the right-hand side of the envelope. It's so easy to add a splash of color using Distress Stains. After the stain dried - you can speed his up using a heat tool, I used Versa Mark and stamped the sentiment "Made with Love" using a set from Rosie's Studio stamp sets I embosse

The Creative Journals and Planners PH Mini-meet and my First Pop-up Booth

Image
Last March 24 was the first Creative Journals and Planners PH (CPJPH) meet up. It was held in Bo's Coffee, Eastwood City. As a small shop starting out, I wanted to try doing a pop-up booth in a small event so I sponsored lootbag content and snagged me a selling spot for the event. I wasn't able to take a photo of my setup but I did learn a lot from this experience on how I can make my setup better. What I did though was make sure I had varying height  displays to make it more appealing, I also had a tall-ish chalkboard sign. It was a big help that I was in the table where the watercolor workshop was done! I was able to absorb what was being discussed and got to try doing some leaves using that magical triangle brush! You can see my chalkboard display too! Lol! Being in the central table is super fun! Aside from getting to participate in the workshop, I chatted up a lot of people! It's a big win for me because I can't move around so much with my big, p

Breaking in my new Mini Happy Planner

Image
Wow. It's already Wednesday and I only had the time and energy to do this spread today. I wanted to do it last Monday the minute this gorgeous mini HP arrived but I was down with the flu and could barely function so I stayed in bed. Then I was so  busy trying to work through my shop backlog yesterday + appeasing a very clingy toddler yesterday that I didn't realize it was already 4am and I had to go to sleep already. So I woke up a little earlier than usual today and worked on this spread. It's the first time I decorated a planner before I even write on it, and I immensely enjoyed the process! I'm not sure if I'll be able to sustain the decorating before writing but it's a good break from always being functional in my planner. It helps that I don't need that much writing space here because it's just my business planner and bulk of what needs to be written down will be in a separate sheet or in my bullet journal! Here's a list of what I used to

Breaking my No Spend Streak

Image
So this came in the mail today! I bought these from the Plannablers Destash Sale last Thursday on Facebook. I asked the shop owners like an hour after saying "Mine" if I could pay now so they can ship asap! Lol! They said yes and I'm majorly ecstatic! I've been wanting a new planner for weeks now. I want a separate planner for my business over at Craft and Knicnax so that it's easier for me to see and track things I have to do for the shop. Things tondo for the shop has been taking over my BuJo and as much as I love writing down stuff in my bullet journal, I'd rather have my business tasks and ideas separate and easily accessible. :) I also bought this scoreboard from Facebook (the planner community in Facebook is awesome!). I've been wanting to have one for some time but I can't justify getting one because I rarely make cards anyway. But since part of my business is making invitations, I know this will come in handy. I also need it for folding

Free Printable: Customizable A5 Vertical Week on 2 Pages for Happy Planner or Ring Binder

Image
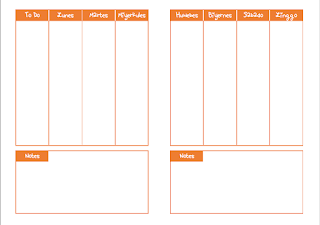
I'm the type of person where pre-made planners do not work. I need my space to be fluid enough to cater to my needs, and that varies by so much. I think the reason is because I use my planners for everything, and the content varies per day; so naturally, my to do list, notes and journal entries won't fit the regular pages of a planner. I started my online business this March and I find myself needing a dedicated planner for my business. It doesn't take too much space in my bullet journal, mostly just to do items and ideas to note of, but I think I'd rather that these things be in a separate planner where I can detail and schedule them properly. Since I'm new to this business thing, I need more structure in my planning. I don't want to devote the extra time of making my weekly layouts by hand so I figured I'd need a regular planner.  I know it's easier (and probably cheaper) to just buy a planner from the bookstore since most of them are on sale n

Ink Smooshing Tutorial

Image
There's this technique that I really like using. It's called "Ink Smooshing" and it makes this watercolor, spatter effect. It's very easy to do and it needs ZERO creativity! Probably why this technique appealed to me so much. The name came from the action that you do in order to achieve the watercolor effect, which is "smooshing" ink on paper. Personally I really like the word "smoosh" and "smooshing". It makes it sound like it's a really fun thing to do; and it is. Something to note though is that the pattern will be pretty random and cannot be replicated since how the ink is smooshed on the paper unpredictable. You can exercise some sort of control on which colors to use, how much ink gets on the paper, and where the colors go. I also noticed that most of the time when I'm doing this, my initial reaction is it looks ugly, but as I put in more colors and splatters, I see it get prettier. There are instances when I

Super Easy Biscuits

Image
This biscuit is my go to recipe for when I want to eat bread or cupcakes but I'm too lazy to bake or I don't have all the ingredients I need. All it takes to make these are: Flour, baking powder, butter, and milk. Everything is a kitchen staple! I use evaporated milk to make it more rich and creamy! Of course the crumb is not the same as bread made with yeast or a moist cake but it would definitely do if you need a quick fix. You know how when a craving hits you hard (read: PMS) and you just want one now and you don't have time to proof bread, don't have the energy to whip up a cake, and definitely don't want to go out and buy anything? Oh boy did these biscuits save me! The biscuits are best eaten on the same day, but then again, these taste so good they wont last the entire day! I've been making this since I was in 2nd year college and whenever I made a batch, I had to set aside a few pieces to make sure I had baon for the next day! haha!

Catching Up

Image
Wow, it's been 6 years since I last updated this blog. A lot has happened IRL (in real life). I was scrolling through the my posts, and the most recent one was a bento post. I remember the days when the bento supplies available here in the Philippines were so few. I thought of opening up a shop of my own but couldn't get it off the ground. I guess was I was too afraid to invest that I didn't put in my best effort to find a supplier. Fast forward to today, bento-ing is a booming craft. Lots of Filipina moms are doing it, which means more stores are selling bento-tools. How do I know? I've frequented a lot of the local hives of Filipina moms - Facebook Mommy Groups! In the 6 years that passed, I got married and started a family with my then nicknamed SDEHBF (super duper extra hot boyfriend). I still think he's super duper extra hot, even if he doesn't believe me. LOL. I mean, I dont know about you but these photos do tell me he is still that SDEHBF I've