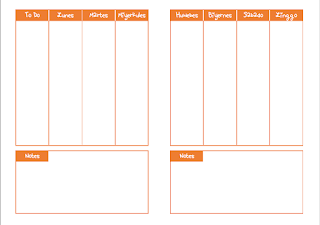
Free Printable: Customizable A5 Vertical Week on 2 Pages for Happy Planner or Ring Binder
I'm the type of person where pre-made planners do not work. I need my space to be fluid enough to cater to my needs, and that varies by so much. I think the reason is because I use my planners for everything, and the content varies per day; so naturally, my to do list, notes and journal entries won't fit the regular pages of a planner.
I started my online business this March and I find myself needing a dedicated planner for my business. It doesn't take too much space in my bullet journal, mostly just to do items and ideas to note of, but I think I'd rather that these things be in a separate planner where I can detail and schedule them properly. Since I'm new to this business thing, I need more structure in my planning. I don't want to devote the extra time of making my weekly layouts by hand so I figured I'd need a regular planner.
I know it's easier (and probably cheaper) to just buy a planner from the bookstore since most of them are on sale now, but I prefer the versatility of a ring or a disc-bound planner. Knowing myself, I know I'll want to change my layouts in the future, especially when I finally get the sense of what I need and how I want it. So for now I created just a basic A5 printable which is a vertical layout of week on 2 pages. I made it using MS Excel because I work fast in Excel, LOL.
Trying to print it was actually the bigger problem because for some reason Excel wont cooperate printing my two A5 pages in an A4-sized paper. I realized I needed to save/print it as PDF and from my Adobe Acrobat Reader, print it on A4. Here is how it looks like:
 |
| Two A5 sheets on an A4 |
It took a lot of trial and error (I wasted around 8 sheets of A4 paper) before I found the sizing that is just right for my disc-puncher and at the same the back-to-back printing of the pages are ALMOST aligned. I used 100gsm paper so the shadowing of the misalignment doesn't bother me too much.
Downloads
I'm sharing with you both the excel file I made so you can change the colors and font as you please.
You can download the Excel file here
You'll also need a PDF printer, if you don't have one yet, I recommend BullZIP PDF Printer. I've been using it for years!
In case you want to use the same font face as I did, it's called "Kittyspoon" and you can download it from https://www.dafont.com/
Excel Editing Reminders
1. Don't move or adjust the columns unless you want to do a trial run like I did
2. You can easily change the border colors by highlighting the cells you want to change the border color of, then clicking the border button, and then selecting "More Borders"
3. You can easily change the fill color of a cell by selecting the cell and clicking the fill color button
4. You can easily change the font face of a cell by selecting the cell and clicking the drop-down arrow for the fonts
5. You can easily change the font color of a cell by selecting the cell and clicking on the font color button
Excel Print Instructions
1. Make sure your paper size is set to A5
2. Check your margins, make sure they are the same in this photo (click Margins on the print setup page)
3. Use the print settings on this photo
Bull Zip Print Instructions
1. Set your paper size to A4 (click Page Setup on the print setup window)
2. On the Print Setup window click Multiple then select "2" on the drop down for pages per sheet.Page order should be "Horizontal" and orientation should be "Portrait".


Comments